-1.png?width=100&height=75&name=Edly%20by%20Arbisoft%20(Red%20and%20Gray)-1.png)
Tip: make sure you have logged in to Edly Panel and have access to Open edX Studio and E-commerce before proceeding with the article.
Certificates are created and managed using Open edX Studio that learners can earn in their course.
By default, Open edX Studio automatically generates certificates when a learner has achieved a passing score in both self-paced and instructor-paced courses.
When certificates become available to learners, a link to the certificate is visible on the learner's Dashboard and the Progress page.
Publish a Course in Ecommerce
Course is first published to Ecommerce with a specific payment mode (Audit, Verified and Audit, Verified only, Professional Education) in order to enable the certificate in Open edX Studio.
To publish a course in Ecommerce:
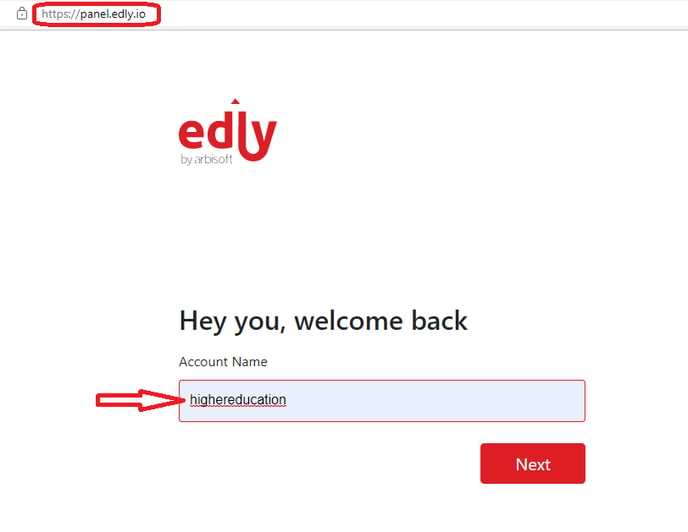
- Login to Edly panel via panel.edly.io using the specific account name. Please see the screenshot below as a reference:
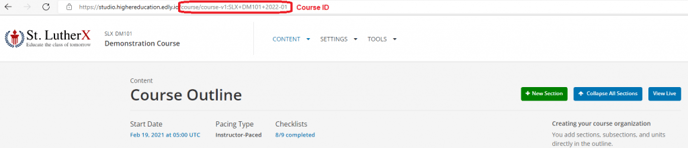
- From the Edly panel top navigation menu, Redirect to Open edX Studio. Screenshot below

- Copy the Course id starting from course-v1 from the Course URL which will be used to publish a course on Ecommerce e.g. course-v1:SLX+DM101+2022-01
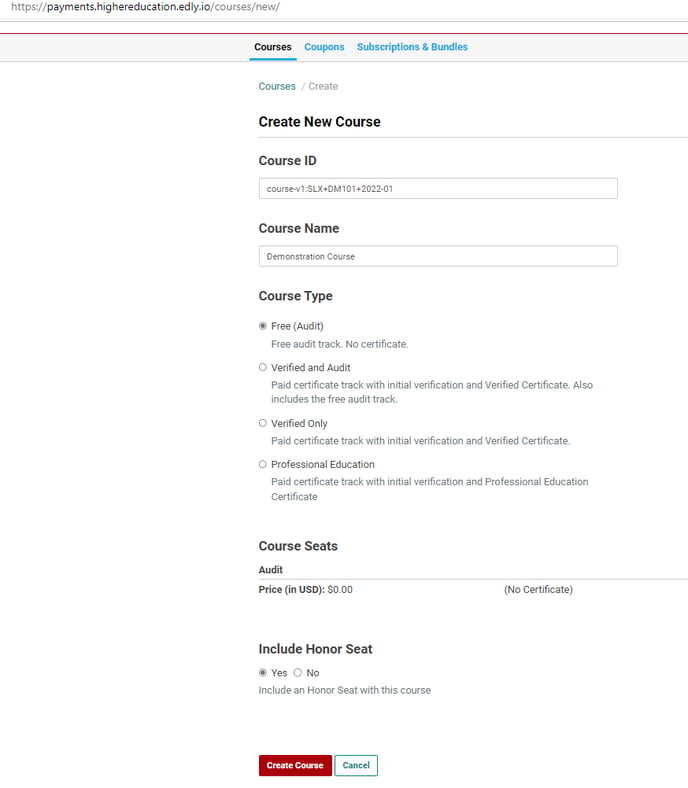
- Revisit Edly panel and redirect to Ecommerce from the top navigation menu. Screenshot

- Click Add New Course in Courses tab on Ecommerce site.

- Paste the course id copied from the course URL in Open edX Studio in Course ID field and provide the course title in the Course Name field.
- Select the Course Type from the given course types.
- For certificates generation without payments, use Free (Audit) and Click Yes for Include Honor Seat.
- For certificates generation with payment gateway, use verified or professional course type according to requirements.
- Click Create Course button and your course is published to the Ecommerce site. Screenshot
Setup a Certificate in Open edX Studio
Now that the course has been published in the Ecommerce site and certificate mode has been enabled in Open edX Studio, you can now configure certificate in the Studio and activate it for the learners.
To setup a certificate in the Open edX Studio:
- Go to the Open edX Studio from the Edly panel or directly from Open edX Studio link.
- Go to the Course Advance Settings from the top Settings menu.
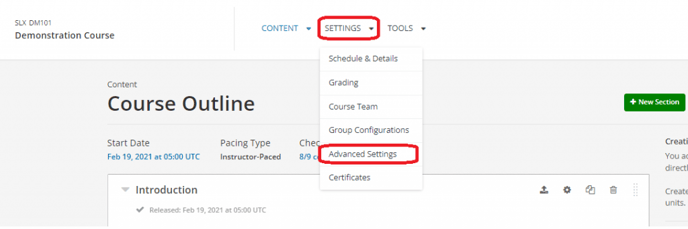
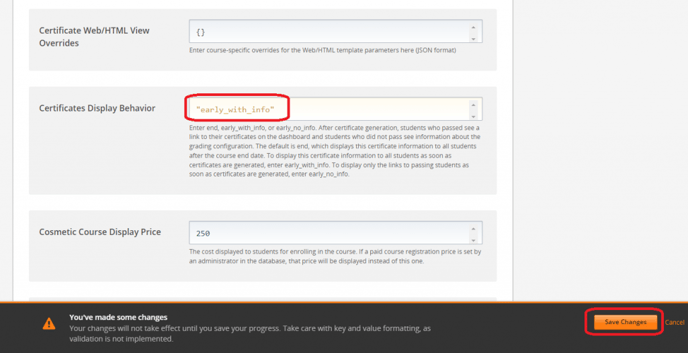
- Set Certificates Display Behavior value to the desired value.
Note: The default is end, which displays this certificate information to all students after the course end date. To display this certificate information to all students as soon as certificates are generated, enter early_with_info. To display only the links to passing students as soon as certificates are generated, enter early_no_info.
- Click Save Changes button to save the changes after setting Certificates Display Behavior value. screenshot
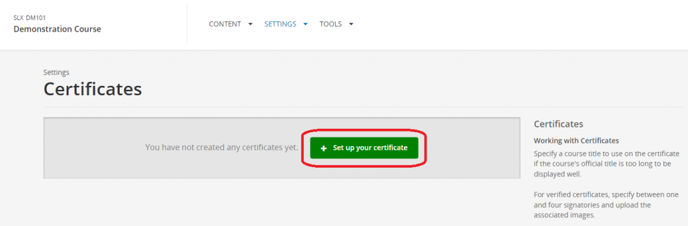
- From the Settings menu in Open edX Studio, select Certificates.
- On the Certificates page, select Set up your certificate.
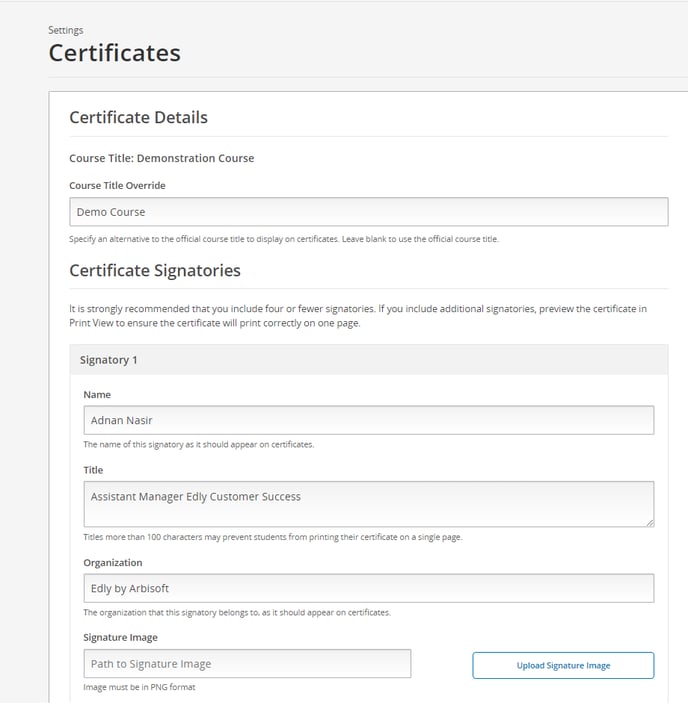
- Specify an alternative to the official course title to display on certificates in the Course Title Override field. Leave it blank to use the official course title.
- Add a signatory for each person associated with the course or organization whose name and title you want to appear on the certificate. You must specify at least one signatory. You can add as many signatories as needed.
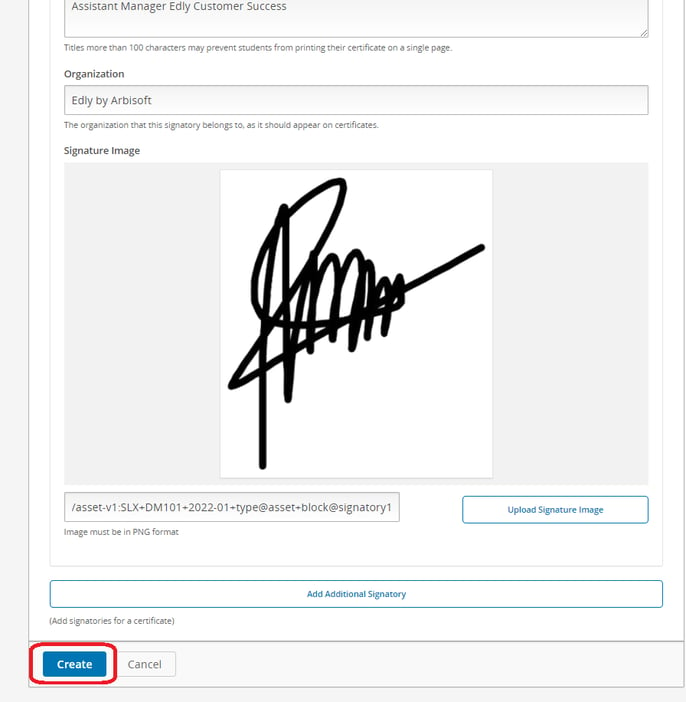
Note: It is recommended that you include four or fewer signatories. If you include additional signatories, preview the certificate in Print View to ensure the certificate will print correctly on one page.
- In Signatory, enter the name of this signatory as it should appear on certificates, signatory title and the organization that this signatory belongs to.
- For verified certificates, upload an image file showing the signature of each signatory.
Note: The image file must be a transparent .png file, 450px by 150px.
- When you have finished adding certificate details, select Create.
- You can preview the certificate to see how it will appear to a learner taking the course in the selected mode.
Note: A course team member with either the Staff or Admin role can preview the certificate.
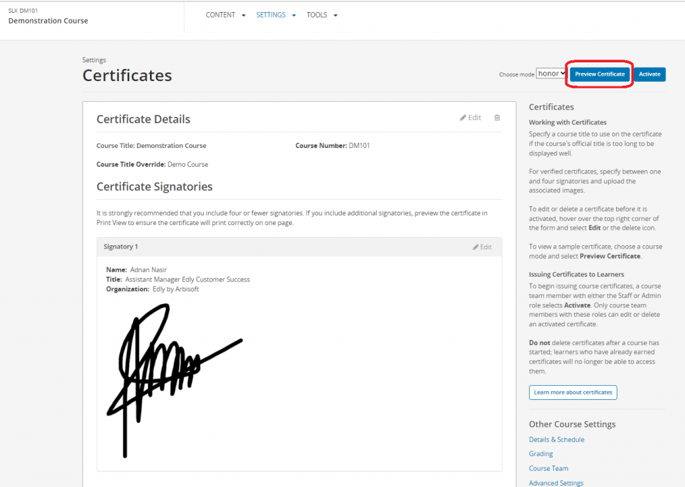
- To begin issuing course certificates, a course team member with either the Staff or Admin role selects Activate.
Note: Course certificate is not available for issuing to learners until it is activated.

- Please see below the default certificate template in a preview version:

- Please visit the following topic Generate and View Certificate as a Learner learn more.