-1.png?width=100&height=75&name=Edly%20by%20Arbisoft%20(Red%20and%20Gray)-1.png)
Overview
Welcome to this guide on how to create direct links to units in Open edX Studio. Direct links can be incredibly helpful in guiding learners to specific content within your course. In this article, we'll walk you through the steps to create these links, making it easier for your students to navigate and access course material.
Tip: Make sure you have logged in to the Open edX Studio before proceeding with the article.
Add a Link in a Text Component
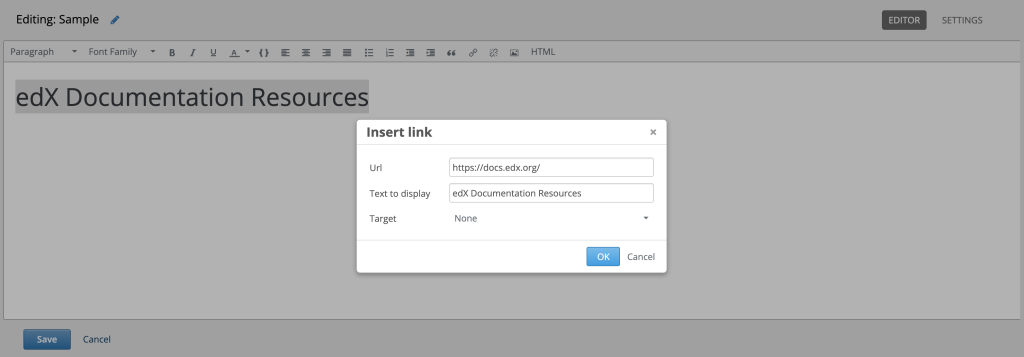
When you use the visual editor, to add a link to a website, course unit, or file in a Text component, you work with the Insert link dialog box.
For more information, see the following tasks.
Add a Link to a Website
- Select the text that you want to use as the link text.
- Select the link icon in the toolbar.
- In the Insert/Edit link dialog box, enter the URL of the website that is the destination for your link in the URL field.
- If you want the link to open in a new window, select the dropdown arrow next to the Open Link In… field, and then select New Window. If not, you can leave the default value.
- Select OK.
- Save the Text component.
- To test the link, select View Live Version or Preview. When the unit opens in the LMS, select the linked text and verify that the correct website opens.
Add a Link to a Course Unit
Note: When you create a link to another component, the unit of that destination component must be published for the link to work.
- Obtain the location ID of the unit you want to link to.
- In Studio, open the page for the unit that you want to link to in Studio, and then locate Unit Location in the right pane.
- Under Unit Location, select and copy the alphanumeric text in the Location ID field.
- Open the Text component where you want to add the link.
- Select the text that you want to make into the link.
- Select the link icon in the toolbar.
- In the Insert link dialog box, enter a value that resembles the following value in the URL field./jump_to_id/<location ID>
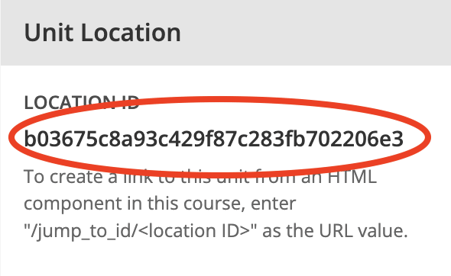
Make sure to replace <location ID> (including the brackets) with the location ID that you copied in step 1, and make sure that you include both forward slashes (/).
Caution: Ensure you use /jump_to_id/<location ID> as the URL value. Do not use the URL of the unit that you see in the browser address bar. If you do not use /jump_to_id/<location ID>, the link will be broken if you export and then import the course.
- If you want the link to open in a new window, select the dropdown arrow next to the Open Link In… field, and then select New Window. If not, you can leave the default value.
- Select Insert.
- Save the Text component and test the link.