-1.png?width=100&height=75&name=Edly%20by%20Arbisoft%20(Red%20and%20Gray)-1.png)
Note: Course coupons can be distributed to learners so they can avail of discounts on course enrollments. This guide explains how to create coupons for a course and distribute them to learners.
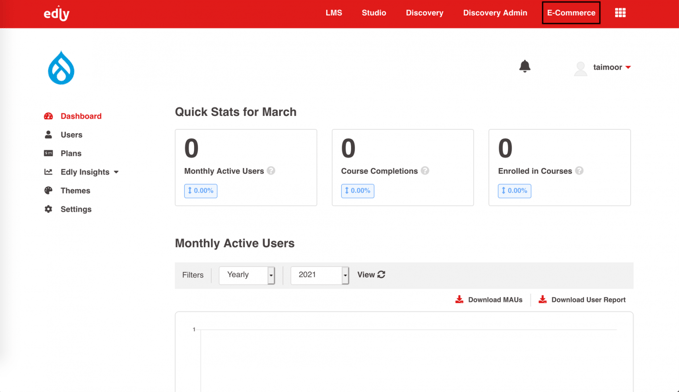
Step 1:
- Login to the Edly panel and navigate to the E-Commerce page
Step 2:
- On the Courses page, copy the course id which you want to create a coupon.
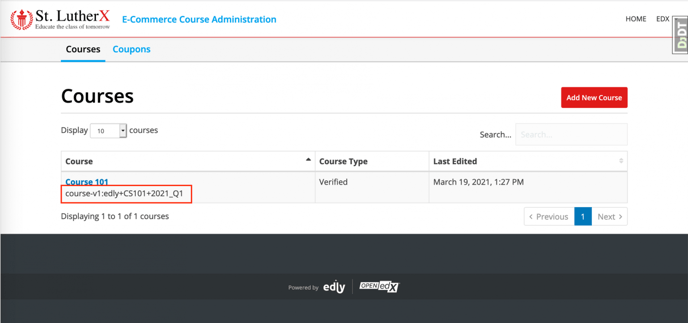
- You need to first publish the course in E-commerce, to create a coupon.
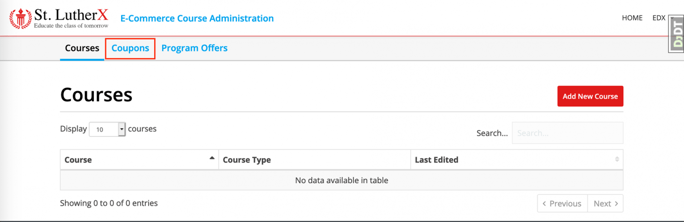
Step 3:
- Navigate to the Coupons page.
Step 4:
- Click on the Create Coupon button.

Step 5:
- Select the Single Course option and paste the course id (copied in Step 2) in the Course ID field.

- Select the Seat Type Honor or Verified for which you want to create the coupon.
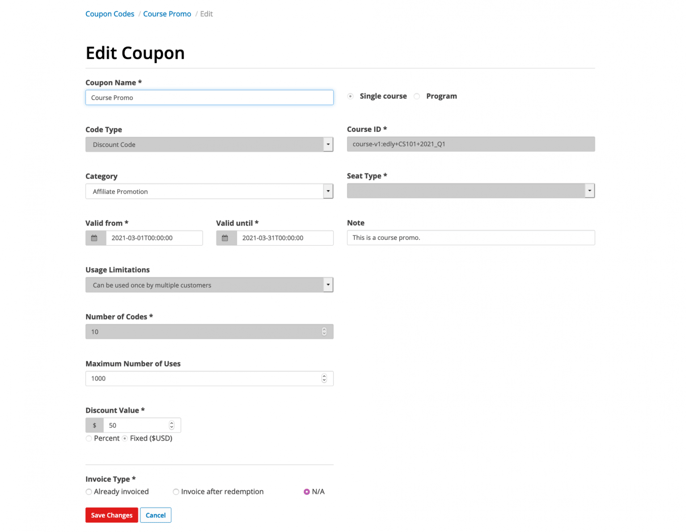
Step 6:
Fill in the rest of the details:
- Coupon Name: Name of coupon
- Code Type: Select from one of the following options:
- Enrollment code if you want 100% discount on coupon or
- Discount code if you want a percentage or some fixed value of discount on coupon.
- Category: Select the most appropriate value that suits your requirement.
- Valid From: The starting date for the coupon.
- Valid Until: The ending date for the coupon. (Please note that valid until date should be ahead of valid from date).
- Notes: Add any notes if any.
- Usage Limitations: Select one of the following from the dropdown menu:
-
- Can be used once by one customer
- Can be used once by multiple customers
- Can be used multiple times by multiple customers
- Code: Add a code (optional, will be auto-generated if not provided). Code field will only appear if the selected code type is Discount Code and Number of Codes entered is 1.
- Number of Codes: The number of codes you want to distribute to learners.
- Maximum Number of Uses: The number of times the code(s) can be used. Maximum Number of Uses only appears if either of the following Usage Limitations is selected:
-
- Can be used once by multiple customers
- Can be used multiple times by multiple customers
- Discount Value: Toggle between Percent or Fixed and enter the desired amount of discount.
- Invoice Type: select N/A.
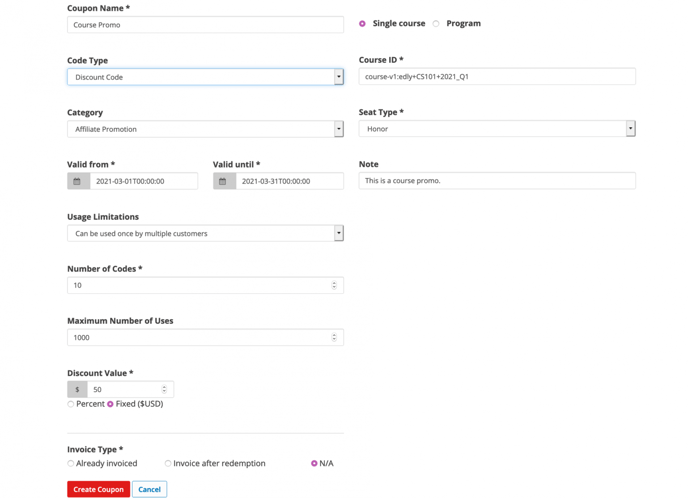
- Click on the Create Coupons button.
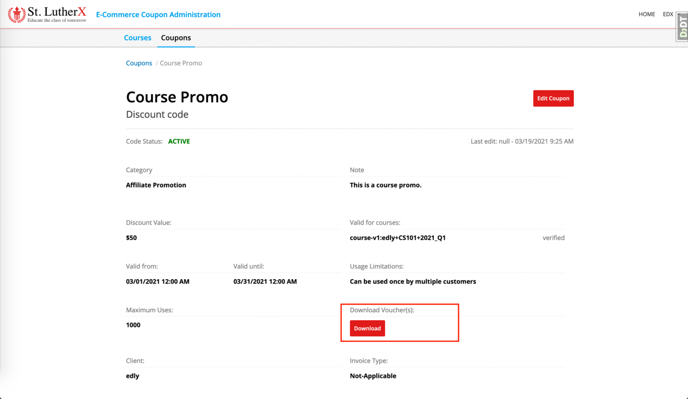
Step 7:
- Click on the Download button to view coupon code/codes.
Step 8:
- Open the downloaded CSV file in a CSV viewer (e.g. MS Excel) to view the code(s).
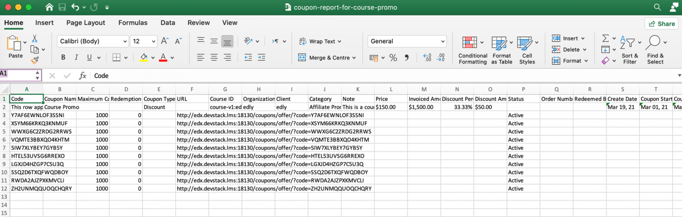
Step 9
- The code can then be copied and sent to learners via an email or a marketing campaign.
How can I edit coupon details?
- To edit a coupon, from Edly Panel go to E-commerce - > Coupons.
- Click on the name of the desired coupon.
- Click the Edit Coupon button.
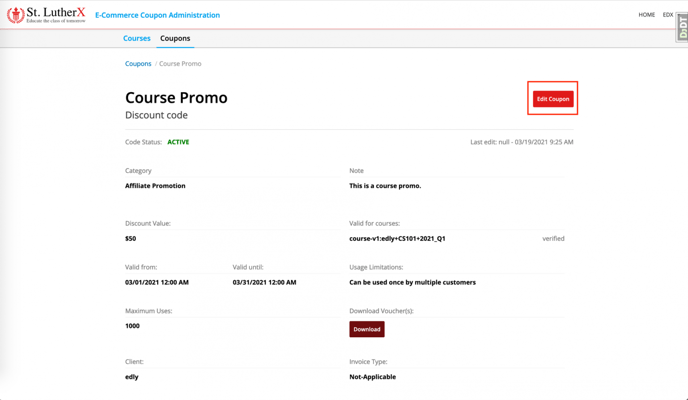
- Make the required changes and click Save Changes.
How can I disable a coupon?
- From Edly Panel go to E-commerce - > Coupons.
- Click on the name of the desired coupon.
- Click the Edit Coupon button.
- Change Valid Form and Valid Until dates to past dates.
- Click Save Changes.
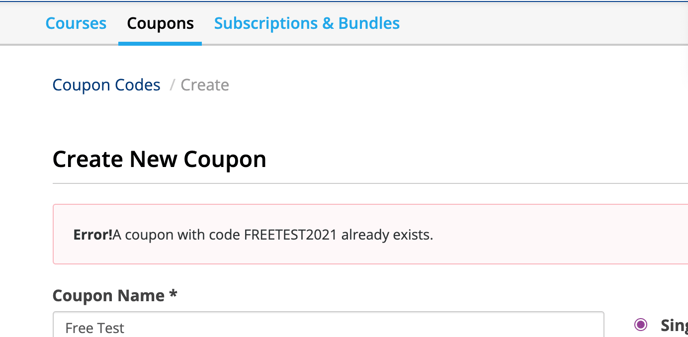
When a new coupon is created, please note that the coupon code has to be unique. One coupon code can’t linked to more than one course. A new coupon code has to be selected each time a new coupon is created/added.