How to Add OneNote LTI in Edly as Instructor?
The following are the steps to use OneNote LTI in Edly.
Step 1:
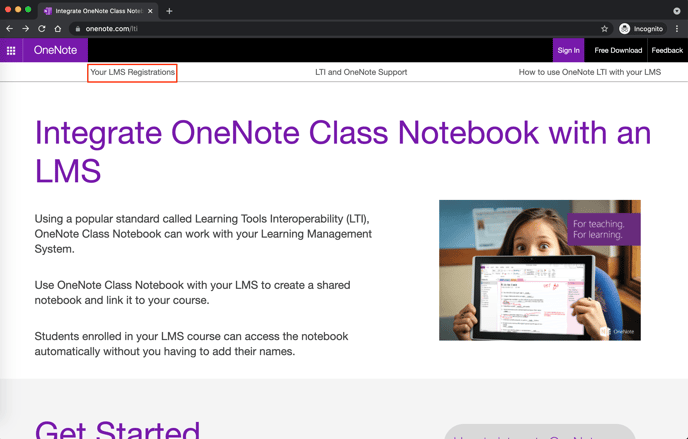
- Go to OneNote LTI and click on Your LMS Registration.
Step 2:
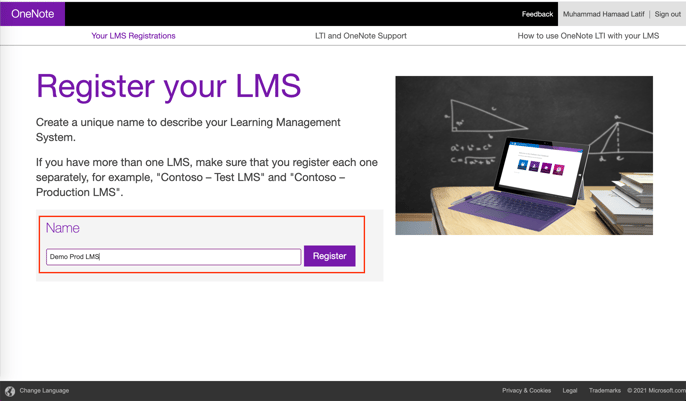
- Log in with your Office 365 account, enter a Name, and Click Register.
Step 3:
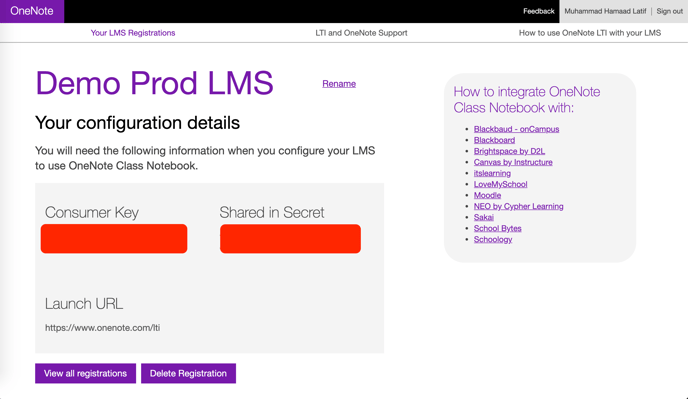
- Copy the Consumer Key and share in Secret and keep them safe.
Step 4:
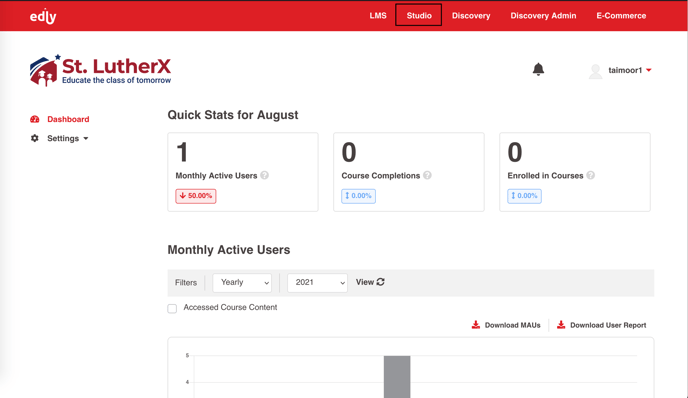
- Login to the Edly panel and navigate to Studio.
Step 5:
- Select the desired course in which you want to add OneNote.
- Navigate to course Settings -> Advanced Settings.
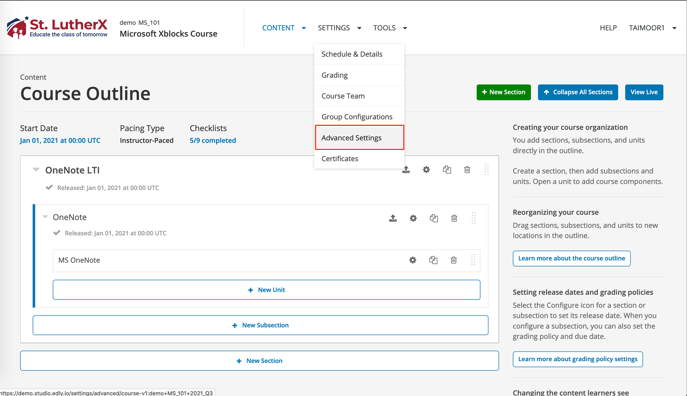
- Add “lti_consumer” to the Advanced Module List.
- Scroll down to LTI Passports and create an LTI passport.
- A passport consists of LTI_ID:LTI_KEY:LTI_SECRET
- The LTI KEY is the value of the Consumer Key and the LTI SECRET is the value of Shared in Secret (copied in step 3).
- Set LTI ID as: onenote
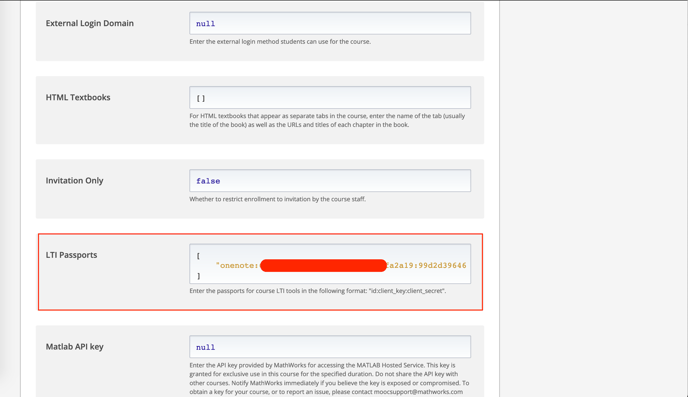
- Click on Save.
Step 6:
- Add a new unit in the course of type Problems → Advanced Problems → LTI Consumer
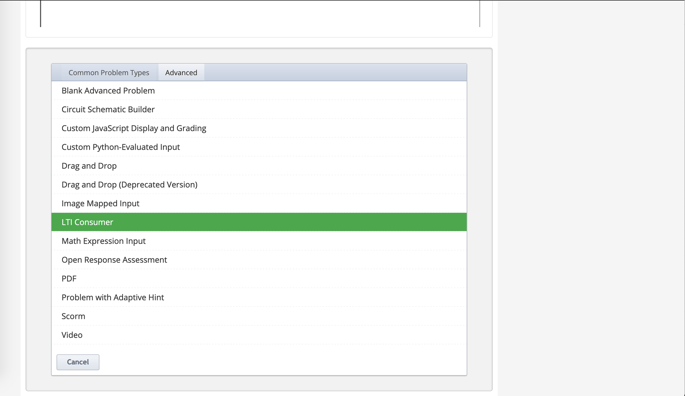
- Click on the Edit button and enter the following:
-
- Name: Name of the component.
- LTI ID: onenote
- LTI URL: https://www.onenote.com/lti
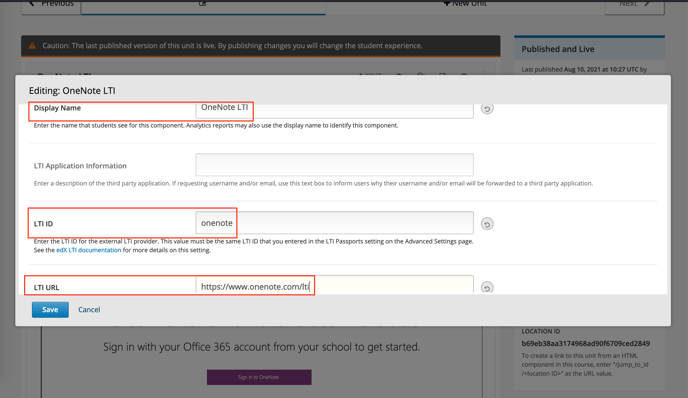
- Click on Save.
Step 7:
Once you have added the LTI settings. The OneNote window will appear and you will have to login with Microsoft if not already logged in.
After that, enter the Name of the class notebook and click on Next.
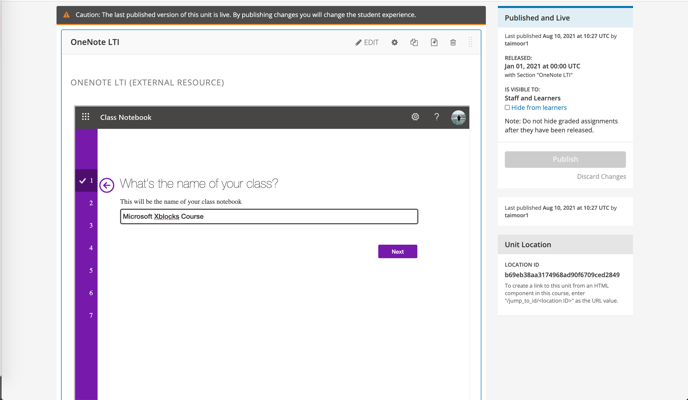
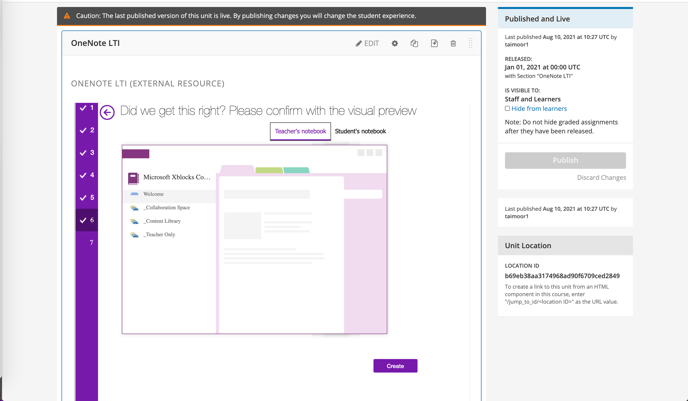
Follow the setup tour and finally click Create.
-1.png?width=100&height=75&name=Edly%20by%20Arbisoft%20(Red%20and%20Gray)-1.png)